I am currently in the process of implementing some the most cutting edge object detection algorithms here and am going to blog my experience implementing them.
This would be a great opportunity for someone not only to learn how deep learning algorithms are implemented but also informs about what it takes to get something research based like this, production ready.
We are going to talk about our input pipeline today. More specifically how we load our data set in Pytorch and generate targets for our machine learning model.
Loading the Dataset
We are going to be using the Coco Dataset to train the object detection model.
The implementation points are:
- Load images and bounding box
- Get images in batches.
- Generate Anchors for each Image
Pytorch provides an easy API to implement both of these.
Prerequisites
Install these libraries:
pytorch
pycocotools
torchvision
Loading Image ids from COCO
The COCO folks have made a library called PyCOCO library. There is an object called COCO through which the dataset is accessed.
# path to Coco Dataset
annFile='/annotations/instances_val_2014.json'

# Loading dataset
coco=COCO(annFile)
This code snippet gets the image IDs, this function return either all of the dataset or only n number of ids. This n is gven by sample in the function.
def get_image_ids(sample=None):
    # get all category ids
    catIds = coco.getCatIds()
    imgIds = []
    # appending image ids of each category
    for id in catIds:
       imgIds += coco.getImgIds(catIds=id)

    if sample == None:
        # Returning the entire dataset
        return imgIds
    else:
        # Returning a subset of the dataset
        return imgIds[:sample]
Once we have our image ids, we need to load the images and bounding box coordinates.
Note: In coco , one image can have multiple bounding boxes
Loading Image and Bounding Boxes from COCO
To load images and bounding boxes. We do the following. For a specific id.
def loadImageNode(id):
    # get image id
    img_id = self.imageIds[idx]
    image_node = self.coco.loadImgs(img_id)[0]

    return image_node
The image Node will be of the following format
{
    "date_captured": "2013-11-20 05:50:03",
    "height": 512,
    "width": 640,
    "license": 1,
    "file_name": "COCO_val2014_000000262148.jpg",
    "coco_url": "http://images.cocodataset.org/val2014/COCO_val2014_000000262148.jpg",
    "id": 262148,
    "flickr_url": "http://farm5.staticflickr.com/4028/4549977479_547e6b22ae_z.jpg"
}
Now , from this image node we get the bounding boxes for them with the following code
def getBoundingBoxCoords(id):
    annIds = coco.getAnnIds(imgIds=id, iscrowd=None)
    anns = coco.loadAnns(annIds)
    coordsList = []
    for a in anns:
        coordsList.append(a['bbox'])

    return coordsList
We get a response as follows for bounding boxes. We extract the bbox array from this json response and return the list of bounding box coordinates
[
    {
        "bbox": [132.99, 21.03, 315.59, 110.4],
        "segmentation": "[<segmentation-mask>]",
        "iscrowd": 0,
        "area": 15019.191850000001,
        "id": 134709,
        "category_id": 3,
        "image_id": 262161
    }
]
Loading Dataset in Batches
Pytorch provides a really easy to follow dataset generating module. The entire code for loading the dataset in batches is goven below. It is quite self explanatory.
# Importing the Pytorch Dataset Module
class CocoDatasetObjectDetection(Dataset):
    """Object detection dataset."""

    def __init__(self, imgIds, coco, transform=None):
        """
        Args:
            imgIds (string): image ids of the images in COCO.
            coco (object): Coco image data helper object.
            transform (callable, optional): Optional transform to be applied on a sample.
        """
        self.coco = coco
        self.imageIds = imgIds
        self.transform = transform
        self.bounding_box_mode = bounding_box_mode

    def write_to_log(self,sentence,filename):
        logger.error(str(sentence) + ' writing to log')
        self.word_err_file = open(filename, "a+")
        self.word_err_file.write(sentence + '\n')


    def __len__(self):
        return len(self.imageIds)

    def __getitem__(self, idx):
        # logger.warning("Generating sample of annotation id: " + str(self.annIds[idx]))

        img_id = self.imageIds[idx]
        image_node = self.coco.loadImgs(img_id)[0]

        return image_node


# Load the Dataset here
def main():
    batch_size = 1
    imgIds = get_image_ids()
    train_ids, val_ids = get_test_train_split(imgIds,percentage=0.05)
    train_ids = train_ids[:10]

    train_dataset = CocoDatasetObjectDetection(
                    imgIds=train_ids,
                    coco=coco
                )
    train_dataloader = torch.utils.data.DataLoader(
                    train_dataset,
                    batch_size=batch_size,
                    shuffle=True,
                    num_workers=1,
                    collate_fn=collate_fn
                )

    for i,img_nodes in enumerate(train_dataloader):

        # do extra stuff here
Anchors
What are anchors ?
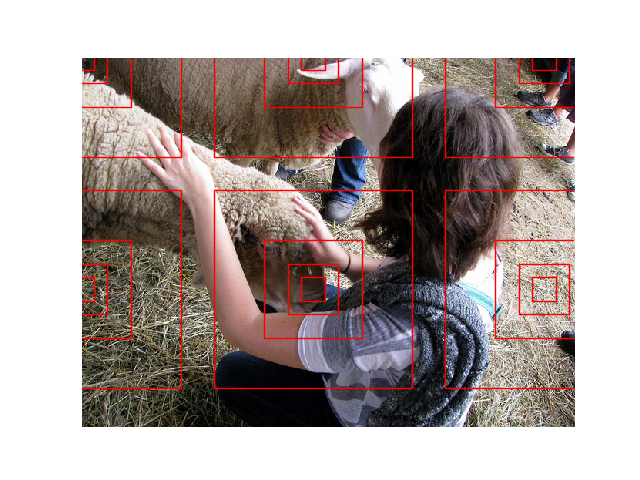
Anchors are meant to denote a set of regions in an image. Anchors are simply rectangular crops of the image. These anchors can be of different sizes and aspect ratios. In practice, at a single pixel in an image, 3 areas with 3 aspect ratios each are cropped out. The authors use areas/scales of 32px, 64px and 128px and aspect ratios of :1, 1:2, 2:1. Hence , 9 anchors are cropped out from each pixel of the image. In the paper, anchors are not cropped for every pixel in the image, Anchors are cropped out after every few pixels in a sliding window fashion. The number of pixels after which a new set of anchors would be cropped out are decided by what was the compression factor of the feature map. In VGG Net , that number is 16. Hence, anchors cover each and every region of the image quite well. Faster RCNN uses the concept of anchors to cover a high percentage of regions in an image.
Anchor Generation
To generate anchors, we take the image width, height and the compression factor.
The code for this is given below
def getAnchorsForPixelPoint(i,j,width,height):
    anchors = []
    scales = [32,64,128,256]
    aspect_ratios = [ [1,1] ]
    for ratio in aspect_ratios:
        x = ratio[0]
        y = ratio[1]

        x1 = i
        y1 = j
        for scale in scales:
            w = x*(scale)
            h = y*(scale)
            anchors.append([x1,y1,w,h])

    return anchors
One tip during the loading of input pipeline is to always try to visualise what you’re doing. let’s visualise our anchors for an image. The compression factor has been bumped up to not let the anchors crowd each other too much.
This image denotes anchors generate around some pixels.

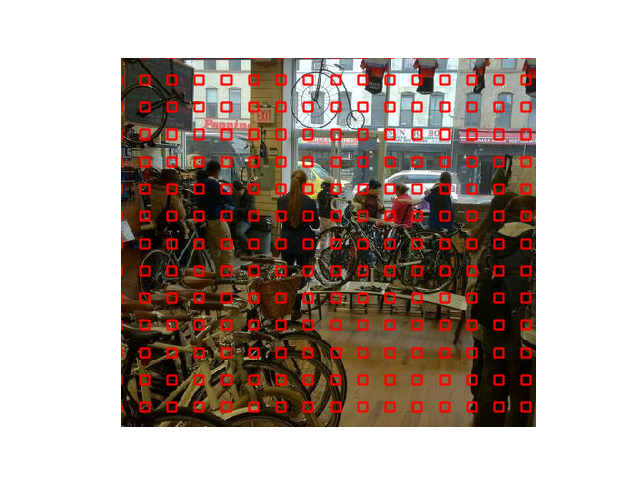
Anchors Centers
We can also visualise anchor centers here

Conclusion
That’s all for today. We generated anchors and loaded the COCO dataset. We shall go more into the actual algorithmic details in future posts. If one wants to read more on object detection algorithms, read through the papers embedded in the README of the Facebook detectron repository.
Cheers